I finally purchased my own domain name and have moved my site to a new home. You can now find me at http://alsrcsite.com!
New Build – SSE (Sig Somethin’ Extra)
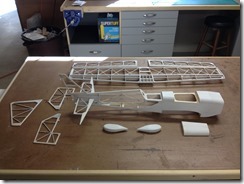
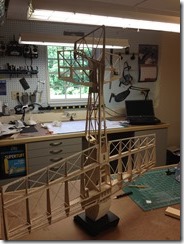
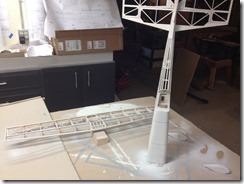
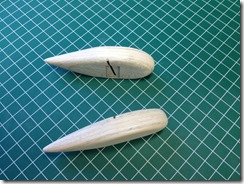
With Stella almost done, it’s time to start in on my next project. I snagged this Sig Somethin’ Extra (SSE) of the classified on one of the RC forum sites a short time back. I have been looking for one of these for a while, and this one came along at the right price. Of course, I plan to convert this to electric power. I also may end up adding a full cowl to the nose (in place of the stock open design). Not sure about that yet.
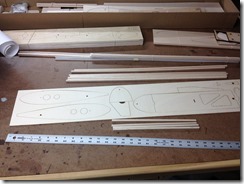
Not much progress yet. So far, just looking over the plans and sorting parts.
Stella – Final Assembly Begins
I finally finished with the covering and have started final assembly.
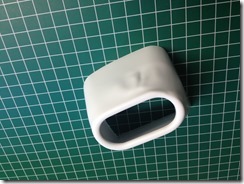
Covering the wheel pants where a a real challenge, but I ended up with a reasonably good result. This gave me confidence to try something “fancy” though (and of course that’s where things went wrong!). I wanted the top of the plastic cowl to match the blue from the top of the fuselage, and thought I could get away with a piece of blue SoLite covering to do the trick. I should have known better, but I after a bit of research, I convinced myself that it was possible and worth the try. Using and iron with a very low heat setting, I was able to attach covering to the back of the cowl. I then thought I could carefully shrink it down with quick little shots from my heat gun … which of course resulted in a distorted cowl.
Oh well … chalk it up to a learning experience. A new cowl (setting me a back a whopping $6.00) is on its way. This one will be left white (with maybe a press on sticker or two for trim). I know that this one is still useable, but, after all this work, I’d hate to have this one big flaw staring at me!
The rest of the assembly is going fairly smoothly. The horizontal and vertical stabs have been squared up and (re)glued, the control surfaces have been hinged and installed, and the servos and servo linkages installed, and the tail wheel installed.
Even though the Stella is not a high-speed plane, I always worry about flutter from hinge gaps. The aileron hinge gap ended up being on the high side of acceptable, so I decided to add in a strip of SoLite along the bottom to seal off the gap. The process is easy, just hold the aileron in its max deflected position (using a bit of tape to hold it there in this case) and fold in a strip of covering (half on the wing TE – half on the aileron LE) with a nice tight crease along the hinge line.
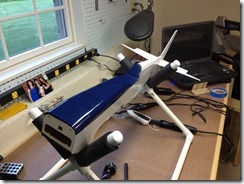
I also have the motor mounted and have given a trial run of all of the control surfaces. Since the motor mount is clearly visible through the wide cowl opening, I decided to dress it up a little by brushing on a quick coat of red acrylic paint.
Left to do:
- Mount the receiver and ESC
- Add Velcro straps for the battery
- Glue down the canopy
- Mount wing and landing gear
- Install the replacement cowl
- Add some final trim to dress it up just a bit
- Check a trim balance
- Trim out the control surfaces
- GO FLY!!!
Stella One Step Forward–Two Steps Back
I did get the wing covered this weekend, but then discovered that the horizontal and vertical stabs (which were glued in to the fuse some time back!) were out of square. I am kicking myself for not checking it when I assembled them to the fuselage, that was just plane dumb! All the laser cut parts slip together with such precision, that I just assumed that everything would key together square. Wrong!
The misalignment became very apparent once trial fit the covered wing to the fuselage and it became obvious that the horizontal stab was not at all parallel to the wings. The vertical stab was also off, but not by as much. So, out with the razor blades and Xacto knifes to carefully cut the horizontal stab free, which I did with minimal damage (other than the covering on the stab). The vertical stab, would require major surgery to remove, so I settled for loosening it up enough to shim it as close to true as possible (not perfect, but close).
I’ve got the stabs recovered and ready to be reassembled, but decided to put it aside for now. I want to look at with fresh eyes before committing to glue (again!).
I also started covering the ailerons. I got one partially covered, but I was not all happy with how it was coming out when the “dinner bell” rang, so I ripped off the covering and decided to call it quits.
Stella Fuse Covering Complete
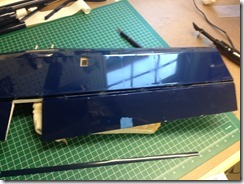
I only got a few hours of build time in this weekend, but I did get the covering on the fuselage completed. I will probably add a bit of red pin striping as a final touch during final assembly.
Stella Covering Continues
I made some more progress on covering Stella. I have sides of the fuselage covered and shrunk down. I did end up burning a hole the covering through while shrinking it down under the tail with the heat gun. It happened at the same time, and happened remarkably fast! The white Solite is almost transparent, so I trimmed to the covering back to the nearest structure and applied a patch. With the seem over a structure, the patch is almost invisible.
I also got the turtle deck covered. This had me a bit concerned, but came it came out pretty good. I was running a bit scarred of burning a hole again, but I just worked it slow. Finally, I started laying down the blue in front of the cockpit. The first piece came out great, but I had a bit of trouble with compound tapers in the front section, so I ripped it off and decided to call it quits for the night.
Stella Covering Beings
I finally ran out of excuses and started covering Stella today. She will be predominately white, with dark blue underneath, in front of the cockpit, and on the rudder/elevator. I’ll probably end up using a bit of red and blue trim judiciously applied to cover up mistakes (of which there will be plenty!). Here’s a shot of all the bones just prior to covering.
This is my second attempt at using film covering and my first time using Solite. My last covering job was done with Solarfilm, which is a bit heavier.
So far, I have gotten the dark blue on the rudder and elevator halves.
The Solite seems to be slightly easier to work with than the Solarfilm. It is so thin that you can spread it out and press down onto the surface and it will more-or-less lay flat and stay in place until you can tack it down. It shrinks easily and wrinkles seem to just disappear with the brief light touch of the trim iron. However, every little surface imperfection shows through and the surface “dents” very easily with the trim iron (no no sock). My regular iron (with a sock) is bit more forgiving in that regard. Also, I’m going through razor blades like crazy, Solite seem to shred and leave ragged cuts with anything but the sharpest blade.
Before starting in on the fuselage, I knocked together a quick and dirty stand out of 1/2” PVC pipe. Total investment of about 15 minutes time and under $10 worth of materials. This has been on my list for some time, but really is a must have to work on the fuse with the horizontal and vertical stabilizers attached.
I also started in on the white sections and have the horizontal and vertical stabilizers done, and one half of the fuselage.
As I feared, the Solite white is all but completely transparent, so even though I am paying a weight penalty, I am glad that I sprayed the model white before covering. In fact, after seeing just how transparent the white was, I touched up all the dark laser burn marks (which were still showing through the paint) with a bit of white acrylic paint. I only needed a few small drops, so the added weight from this step is truly negligible at this point.
I have shrunk the covering on the stabs and the front half of the fuse (i.e.; the fully sheeted section), but will wait until I have both sides covered before shrinking the open framework at the tail end.
Covering is definitely not my strong suit, but I feel like I am getting better at it. I’ll happy if I end up with a “C+” to “B” level job at the end.
Stella Good News – Bad News
Well good news – bad news on Stella. Good news, I got all of the little things done I needed to to to get ready for covering.
I even got a coat the coat of white primer on.
The bad news, the primer added much more weight than I thought – about 0.6oz!! That’s about twice what I was estimating. Nothing that can be done about now though, I will sand off as much as possible, but it looks like I just blew away any weight savings I would have gained by using Solite instead of Solarfilm.
Oh well …
Stella Final Sanding
I’m still fussing around with a few details before covering. I have finished the final sanding on the tail feathers, rounding off the leading edges of the vertical and horizontal stabilizers and sanding in 45 degree chamfers on the control surface leading edges. I also finished final shaping of the wheel pants.
Final tasks before covering are: add the guide tubes for the rudder pull-pull cables, cut hinge slots for the control surfaces, glue the horizontal and vertical stabs to the fuselage, and mist on a coat of white primer. I know that the primer will add weight, but not much, and it create a uniform base color under the semi-transparent Solite white covering.
Stella Wing Reinforcement
I started sanding the aileron assemblies today an noticed that they twisted quite easily and were more flexible than I was comfortable with. I know that the covering will help with this (quite a bit actually), but I had trouble with the ailerons in my RV-4 twisting as I shrunk the covering. Since I really like building things anyway, I decided not to leave things well enough alone and added some reinforcing braces. I actually saw this technique used in a old Stella build thread on one of the RC forums (not sure where right now).
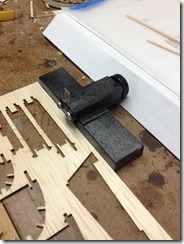
I started by cutting some balsa strips from scraps using my handy dandy Master Airscrew Balsa Stripper. This is great tool and makes quick work out of cutting any size stringer out of whatever scraps you happen to have lying around.
Next I added the braces running diagonally in each open bay just under the profile of the rib. I kept all of the braces on the top side running in one direction, then flipped the aileron over an ran braces on the other side in the opposite direction. I was so amazed at the increase in stiffness, that I went ahead an applied the same treatment to the wing. The total increase in weight for both ailerons was about 3 grams. I did not get a before and after weight on the wing, but it would probably not be much more (maybe 4-5 grams) as it has the same number of braces, just slightly longer. All in a dramatic increase in stiffness for a weight penalty of well under 10 grams, not bad.
I did run into on snag when adding the wing braces though. I did the first half of the wing without weighting it down to the building board. I thought that since I was being careful fit each piece without adding any initial tension, that I would not introduce any initial twist and I wanted to be able to flip back and forth as I glued each brace in. Unfortunately, I did end up with a bit of twist locked into the wing, so I had to carefully cut out the braces and start again. This time, I did weight down the wing to my building board and only worked from the top side (working on one half of the wing at a time, of course). This was a little trickier, but resulted in a flat, true, and stiff wing.
I also added another round of balsa filler to the seems on the fuselage and sanded it down with 220 grit followed by 320 grit sandpaper.


